Let’s kick this off with a scenario.
Picture a relay race where every runner passes the baton to a different person... except none of them know where they’re going. Chaos, right?
Well, that’s what happens when every demo for a single account gets handed off to a different sales rep. The poor first rep who cracked open the door is left in the dust, while new faces bumble through, asking the same questions all over again. It’s disconnected, inefficient, and, frankly, unfair.
At RevenueHero, our customers have been using lead-to-account matching. And honestly, it isn’t just about keeping the sales reps happy — it’s about giving their prospects a great buying experience.
Here’s your step-by-step guide to using RevenueHero’s lead-to-account matching.
.webp)
1. Create a matching rule
First up, we need to define some rules. In the land of RevenueHero, we call them Matching Rules. These little wizards will sniff out when an inbound lead already has an account owner in your CRM and make sure they get paired up like PB&J.
1. Assign meetings to existing contact owner
2. Assign meetings to existing account owner
If you want to create a new matching rule, follow these steps:
- Go to “Inbound” in the RevenueHero navigation bar.
- Click on “Matching Rules.”
- Click on “Create New Rule.”
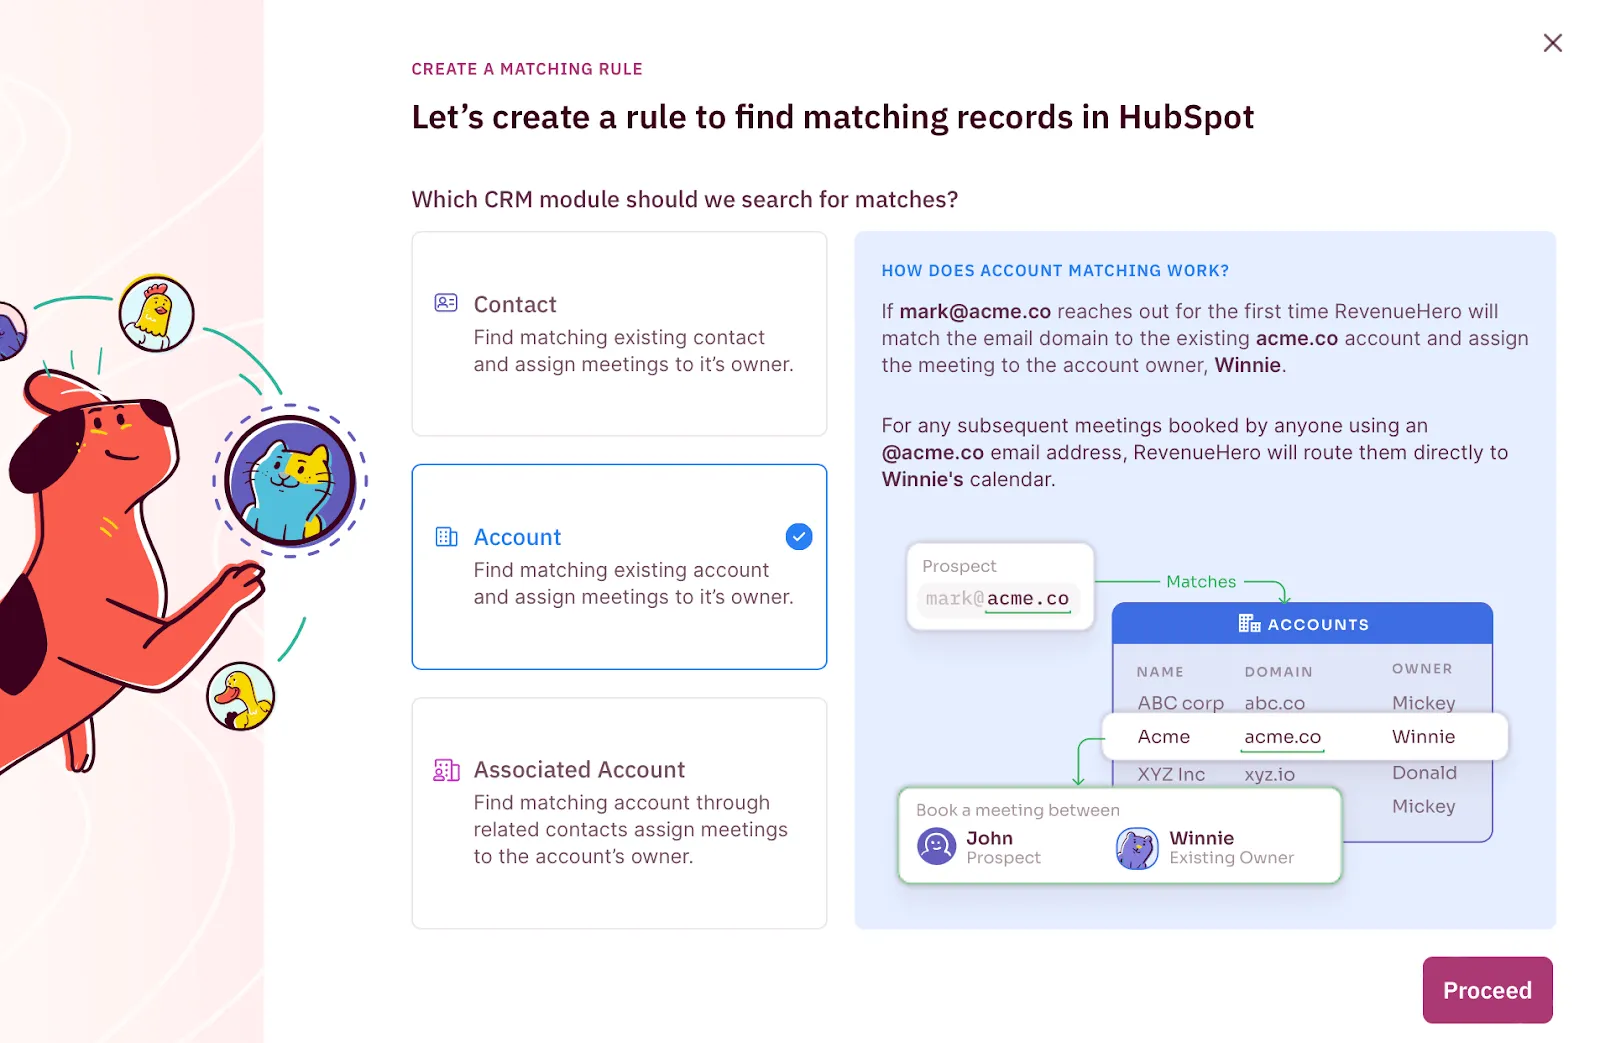
- Now, you’ll need to select if you want to match based on contact owner, account owner, or based on a matching account through a related contact.
- For this example, we’re going to match based on the existing account owner. So, we’ll select “Account” and click on “Proceed”.

2. How do you want RevenueHero to match the prospect?
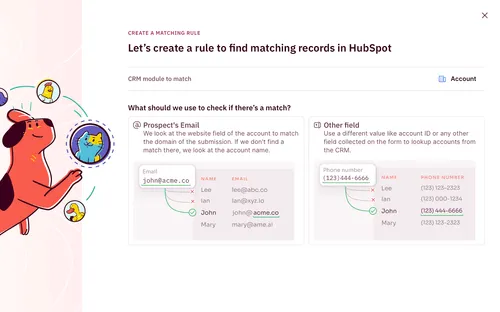
Next, we’ll need to tell RevenueHero which property’s value in your CRM it needs to check to see if there’s a match. You have two options here:
- Using prospect’s email address: This is relatively simple, straightforward, and often sufficient for most use cases. If you decide to match using the prospect’s email address, RevenueHero will look at the website field of the account to match the domain of the submission. If we don't find a match there, we look at the account name.
- Using any other field: If matching based on email address isn’t sufficient, pick “Other field”. This lets you tell RevenueHero which field value from the form you want to lookup accounts from within your CRM. For example, if you collect ZIP code on the form and have an account owner for each ZIP code you can tell RevenueHero to match to the account owner based on your prospect’s ZIP code.
In this case, we’ll select using the prospect's email address and click “Proceed”.
 PRO TIP
For example, if you have an account in the 11-50 employees range with an account owner who usually handles only accounts with 501-1000 employees range, you can ensure these smaller accounts get filtered out from the matching rule and instead assigned to other reps via round robin distribution.

3. How many people should be on the call?
Finally, you can set how many people from your team need to be added to the call. You’ve got two options here:
- Schedule meeting with the owner: This will display the scheduler and calendar availability of the account/lead/contact owner based on what you set above.
- Schedule meeting with multiple people: This will display mutual calendar availability of the account/lead/contact owner based on what you set above and any additional users who need to be on the meeting.
In this case, we’ll select schedule meeting with the owner and click “Proceed”.
 PRO TIP
For example, if you’re selling a rather technical product, you can pair your sales rep with a solutions engineer on the first call automatically. This lets you both answer any technical questions right on the first call, show product demo, and give a great buying experience for your prospect.
You’ll see a summary of all the things you’ve set up so far. If everything looks good, click on “Looks good, proceed”.
4. Editing the nitty-gritties of matching rule
Next, we’ll get into customizing the finer details of your matching rule.
Here are few things you can customize:
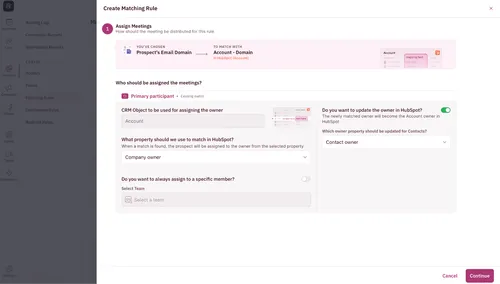
- Customize which owner property to use when matching: By default everyone has an account/contact/lead owner property. Some companies might also have properties like SDR owner and CSM owner. If you’d like to match to any of these other properties, this is the place for you to make that edit.
- Always assign the meeting to a specific member: This is a great use case if you want to override the matching rule and always assign the meeting to a specific member.
- Update owner property in your CRM: Enable/disable updating owner properties in your CRM. If you choose to enable this, you also have the ability to choose which property in your CRM you’d want to update. If your accounts are still assigned to an owner who left the company, (who doesn’t? :D), enabling this is a great way to indirectly clean up your CRM.
Once you’ve customized your matching rule, click “Continue”.

Next, you’ll have the option to add conditions to the matching rule. This is the same as in step 2. In case you decide to add/edit the conditions you previously set, you can change it here and click “Continue”.
In the last step, give your matching rule a name. Finally, you can customize the following advanced settings:
- Add guests to your meetings: Add specific people from your team along with the lead/contact/account owner to all the calls that get booked through this matching rule. A great use case for this would be to include your sales manager on all the calls.
- Override default meeting settings: You can set a common meeting setting for each router. Each router can have multiple matching rules (like this one), distribution rules, and redistribution rules. If you have multiple meeting types created already, you can set a different meeting setting just for the meetings that pass through this matching rule.
- Change redirect URLs: You can set a common redirection rule for each router. However, if you wish to route prospects to a specific page when they satisfy this specific matching rule, you can set one over here. You can also set specific URLs for when the meeting is booked and a separate URL for when the meeting is not booked.
Once you’ve made the changes, click “Save”. And that’s it, your matching rule is successfully created.
.webp)
5. Activate the router (This is where the real fun begins)
Rules without action are like a car without wheels — pointless. To bring your matching rules to life, you need to hook them up to the inbound router(s). Here’s what you do:
- Head to “Routers” in the Inbound nav bar.
- Plug in the form, matching rules, and distribution rules (check this playbook on how we use distribution rules to route, assign, and schedule meetings based on territory).
- Set the meeting type and widget that’ll appear for booking.
Once your matching rule is live, the router will prioritize it above all else. It’s like giving the account owner a fast pass—no need to wait in line. If the lead doesn’t match any of the matching rules, that’s when the distribution rules kick in.
When everything’s configured, hit publish. Boom — you’ve just turned lead chaos into a well-oiled machine.
.svg)


